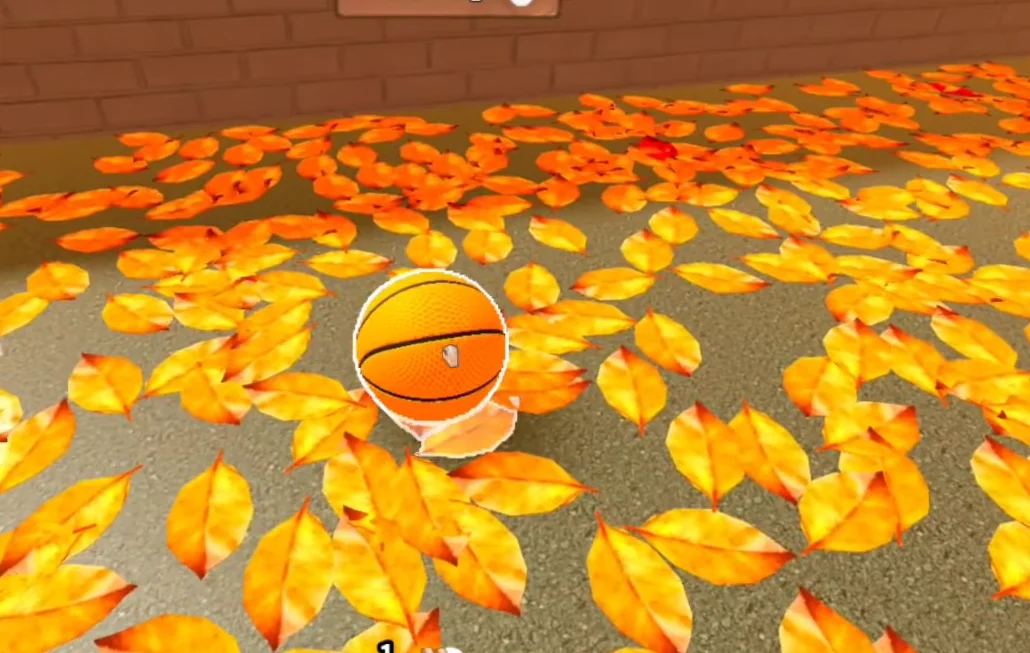
This page covers the map: the areas you unlock, the facilities inside them (sale points, the garage puzzle), how hidden leaves work, and the routes that clear each property in the fewest trips. Area names and details are measured from gameplay footage; the game does not publish an official map.
The game is a sequence of areas that unlock as you progress, each one messier than the last. Every area tracks its own completion counter (shown as a percentage), and the counters feed the total that decides the secret ending.
Unlock logic.
Areas open two ways, both video-verified:
Paid gates — some areas cost Cash to open. The garage is the known example (~$1; shed-style buildings run $2–$9), with the price shown on the gate.
Completion gates — other areas only open after the previous area is fully cleaned (100%), or after progress objectives are met.
Progress display.
The progress bar sits at the top of the screen, per area, as a percentage (e.g. "Front Yard 4.8%", "Garage 41%", "Rooftop 85%"). Use it to see how close the next unlock is and which area is dragging your total.
Leaf respawning.
Most areas run on a wave system: clear the current wave of leaves, the game prompts "second wave" (or "another wave") and the area re-sweeps with fresh leaves; after the final wave the area stays permanently clean. Treat every area as potentially multi-pass — an area that looks done may have another wave waiting.
The Areas (Video-Observed)
Gameplay footage shows the following areas. Names are from videos; areas with thin coverage are marked as such — the full unlock order and per-area details are not all recorded yet.
Front Yard
What it is.
The starting area — where you spawn, learn the loop, and earn your first Cash.
Known details.
Progress appears as a percentage ("Front Yard 4.8%" in footage). The garage and shed are accessed from or near here. This is the natural first farming ground before paid gates open.
Unlock.
Free — the game starts here.
Porch
What it is.
An early unlock area adjacent to the starting ground.
Known details.
Little footage exists beyond its name and early placement; treat it as an early income extension. Its unlock condition is not recorded.
Shed
What it is.
A small building on the property — and the key to the garage.
Known details.
Contains the red round button on a wooden surface that opens the garage door. Some footage shows shed-style buildings costing $2–$9 to unlock. The full interior is not documented.
Garage
What it is.
A confirmed unlock area and the most documented facility besides the sale point.
Known details.
The door reads "Find the button to open it!", with a ~$1 unlock price shown at the door in some footage. Inside: a closed wooden space with dense yellow leaf piles and glowing special leaves (green-veined Garage leaf, sapphire, ruby variants).
Unlock flow.
Footage differs slightly: pay the area price, find and press the button in the Shed, or both — expect a pay step, a button step, or both.
Court
What it is.
A mid-game area; footage shows a "Wave 0/1" task indicator here.
Known details.
Confirms wave-style cleaning in this area. Little else recorded.
Rooftop
What it is.
A later area — footage shows "Rooftop 85%" progress.
Known details.
Elevated layout; expect leaves on ledges and camera-dependent hiding spots (see Hidden Leaves below).
Pool
What it is.
A wave-style area (footage shows the wave prompt in areas including Pool).
Known details.
Listed in the collection log; wave behavior confirmed by gameplay footage.
Farm
What it is.
A later area mentioned in footage and the collection log.
Known details.
Little beyond its name and late placement; treat details as unrecorded.
Basement
What it is.
The story area — the first "chapter" ends here.
Known details.
Clearing the basement triggers the story beat where you find yourself trapped in a lab dish, "kidnapped" by your friends — the game's humorous mystery twist. (More in the story notes below.)
Maze
What it is.
A late area with rare-leaf content.
Known details.
Has a rare leaf type — Maze Leaf, ~7% drop per the collection log. Wave or multi-pass behavior likely but not confirmed.
Coverage note. This list is confirmed-but-incomplete: it reflects what videos show, not a full official map. Areas with little footage (Porch, Court, Farm) are placeholders until more gameplay is recorded.
Map Facilities & Unlock Interactions
The Sale Point (Vent / Garbage Bin)
What it is.
The yard's dumping facility — called the vent, sale area or garbage bin in different videos; it is the same function everywhere: carry a full bag there, dump it, and the leaves convert to Cash. It is the only income source, so the route between the piles and the sale point defines your efficiency.
What it looks like.
Square or round metal grilles set into the ground or against walls — often in "background" geometry players walk past. Some videos also show leaves being swept or blown into the grate to clear batches.
Traversal note.
In some areas, sale-point vents double as routes into pockets you cannot reach on foot. Note whether a route is one-way or a connector before committing a full bag.
The Garage Puzzle
What it is.
A confirmed unlock interaction: the garage door reads "Find the button to open it!", and the red round button sits on a wooden surface inside the Shed.
Unlock flow.
Some footage shows a ~$1 unlock price at the garage door; expect a pay step, a button step, or both (videos show the sequence slightly differently).
Inside.
A closed wooden space with dense yellow leaf piles and glowing special leaves — a high-value sweep once opened.
Key-Like Interactions & Cleaning Gates
What they are.
Two confirmed gate types:
Key-like interactions — collectible or pressable objects near a blocked route; pick it up / activate it, then check the door for a state change.
Cleaning gates — spaces that only open when the approach is actually clean. Fully clear the carpet leading to a suspicious door before assuming it is broken.
Habit.
Confirm whether a gate opened before sprinting away — and in co-op, call "key-like item on me" so the lobby does not duplicate the search.
Wave Zones
What they are.
Areas that re-sweep: clear the current wave of leaves, the game prompts "second wave" (or "another wave"), and fresh leaves fall before the area is permanently clean.
Known wave areas.
Court (task indicator "Wave 0/1"), Pool, and other zones in footage; Yard/House-level waves are also described. Treat every area as potentially multi-pass.
Why it matters.
A wave zone that looks done may still have a second wave waiting — check the wave counter before declaring an area complete for 100%.
Hidden Leaves & The Collection Log
Special leaves are visually distinct. Normal leaves are standard brown/yellow autumn leaves worth ~1¢ each. Special leaves stand out by color and glow — red leaves, bright green leaves, rainbow-glow leaves — and sell for 2¢ to 5¢ each. (One video showed no glowing-leaf system, but multiple others confirm it; treat the glow as real.)
The collection log (Journal / Collection) lists the rare leaves per area and shows drop rates (e.g. Maze Leaf ~7%). Collecting the full set unlocks a dedicated Game Badge.
The stuck-counter fix. If the counter sits below 100%: walk slowly through already-cleared areas with the camera angled at the ground, check transition paths, and re-inspect edges — the missing leaf is usually visually blended into the environment.
Where hidden leaves hide.
The pattern from footage and community notes:
Edges and corners — Property borders and fence lines.
Object boundaries — Around props, decorations and buildings.
Elevated spots — Rooftops and ledges (Rooftop is the obvious case).
Transition paths — The routes between areas, which players treat as travel, not cleaning zones.
Out of the default camera view — Many leaves only appear from above or the side.
Route Strategy
Route planning is the difference between a fast clear and a wasted session.
Find the sale point before you start sweeping.
A long dump run wastes several trips per area; spot it on the way in.
Sweep in lanes, one section at a time.
Clear each section completely before moving on — partial sections are how you lose track of the last few leaves.
Camera angled at the ground.
The single most effective trick for finding isolated leaves; many blend into the environment from a normal view.
Check areas twice before leaving.
Isolated leaves are easier to miss than big piles; a second pass with a different camera angle catches most of them.
Expect waves.
If an area re-sweeps with a "second wave" prompt, that is the game, not a bug — clear the wave, then the area is permanent.
Unlock, then immediately clean.
A paid gate (garage ~$1) opened and left uncleaned is lost income; new areas are where leftover percent hides.
In co-op, divide the roles.
One player owns sale trips, one owns unlock interactions (garage button, gates), the rest stay on the piles.
Story & The Ending
The mystery is the game's second layer. Gameplay footage shows the story playing out as playful suspense, not horror — no jumpscares:
The first chapter ends in the Basement with the "kidnapping" reveal: you wake trapped in a lab dish, watched by your own friends.
Later chapters continue the absurd thread (a van ride, a mansion, an oddly suspicious pigeon on the way home).
The secret ending (100%) takes you to an underground chamber of monitors and clone labs, followed by a results screen (time, leaves cleaned) and the class/spin UI.
Where the ending lives. There is no "rebirth fountain" facility in the footage — earlier guides described one, but multiple gameplay videos show the ending as the lab-chamber scene instead. Treat the lab scene as the confirmed ending.
FAQ
How do I unlock the next area?
Two ways: pay the Cash price shown on the gate (e.g. garage ~$1), or fully clean the previous area to 100%. Some areas need both.
Where is the progress bar?
At the top of the screen, per area, as a percentage (Front Yard, Garage, Rooftop, etc.).
What is the sale point?
The dump facility for converting full bags to Cash — called vent, sale area or garbage bin in different videos; same function everywhere.
How do I open the garage?
Find the red button — footage places it inside the Shed — and press it (some footage also shows a ~$1 unlock price at the garage door). The door reads "Find the button to open it!".
Do leaves respawn?
In waves. Clear the current wave, the area re-sweeps ("second wave"), and after the final wave it stays clean. There is no endless respawning.
Are special leaves easy to spot?
Yes, once you know: they have distinct colors (red, bright green, rainbow glow) and sell for 2–5¢ vs 1¢ for normal leaves. The collection log shows each area's rare leaves and their drop rates.
Is the "rebirth fountain" real?
No — multiple gameplay videos show the ending as a lab-chamber scene with a results screen; no fountain facility appears in footage.
Is the game scary?
No. The "kidnapping" is a humorous story beat — playful suspense, no jumpscares.